
Showing posts with label seamless nuno felted garment. Show all posts
Showing posts with label seamless nuno felted garment. Show all posts
Saturday, October 1, 2016
Thursday, July 25, 2013
Making a Nuno Felted Seamless Reversible Vest Using a Resist.
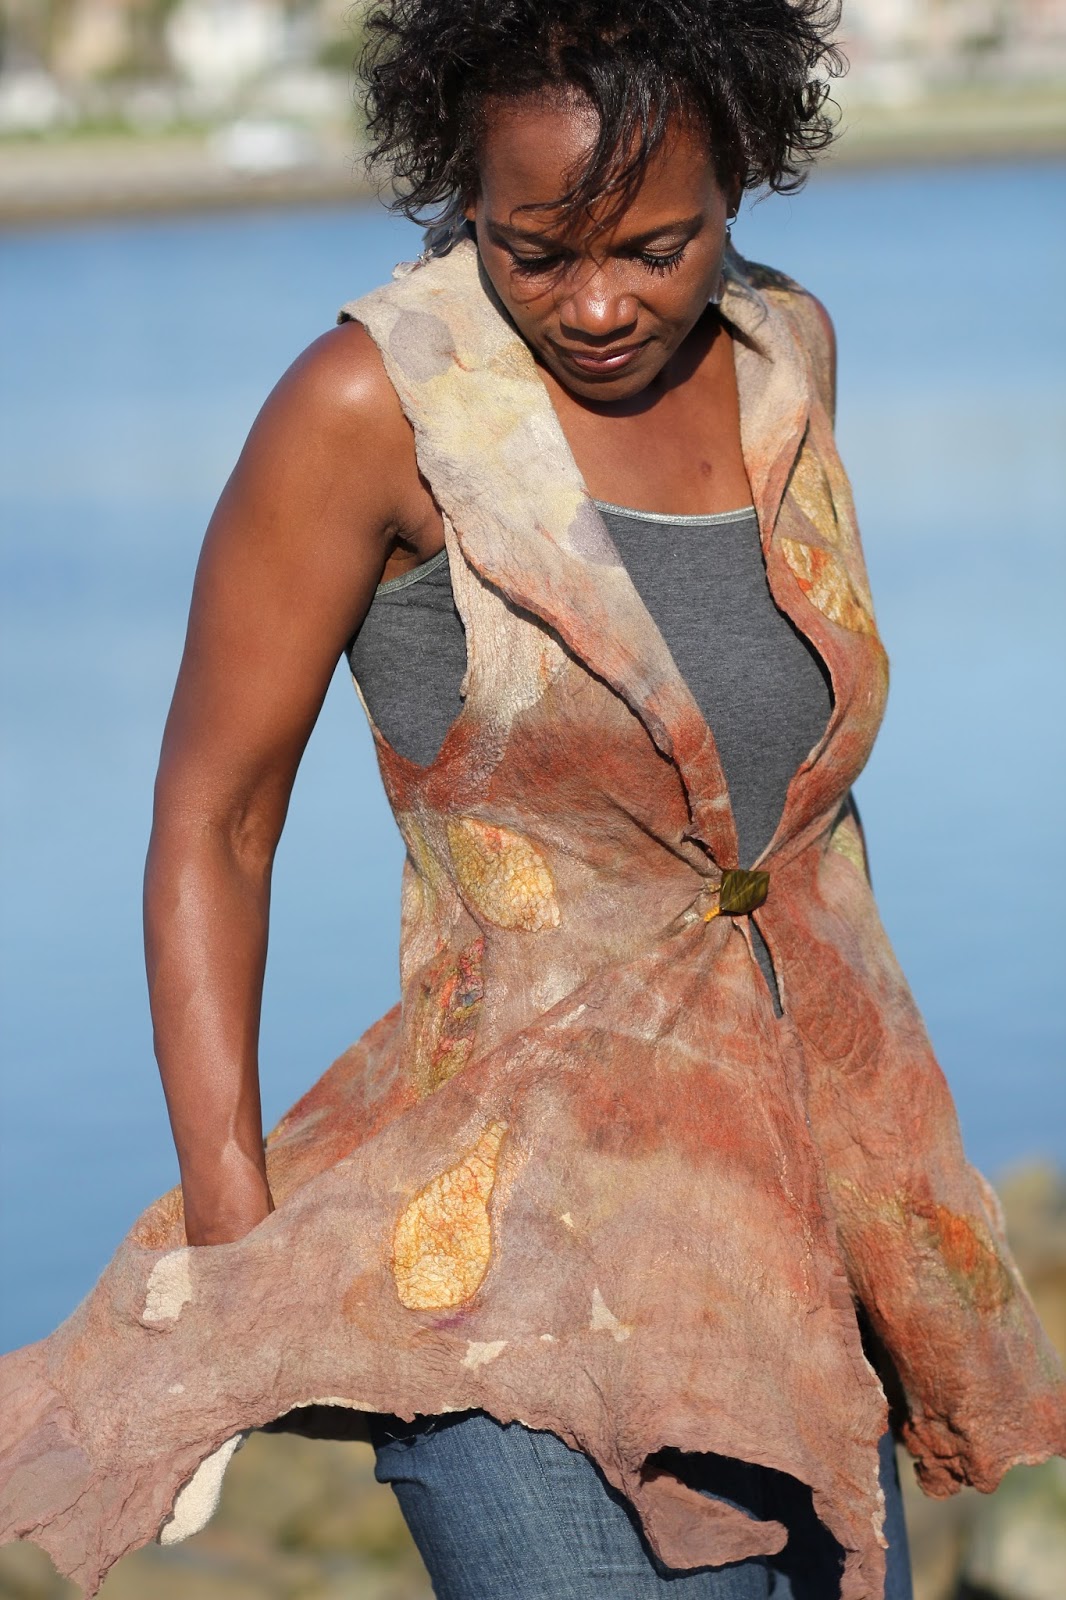
This is a reversible seamless nuno felted vest with hidden pockets in the seam. I bought the vintage button at the Paris flea market years ago so it really is special. For one side of this vest, I used silk gauze pieces that I had previously bundle dyed in a pot of eucalyptus. I also used pre-felts cut into leaf shapes. For the other side, I used plain white silk.
One layer of super fine white merino wool was sandwiched between the two layers of silk. I then printed/bundle dyed the white side with eucalyptus leaves.


I make my templates/resists from floor under layment which is nice and sturdy and holds up well to the soap and water. You can buy it in a roll at Home Depot or Lowes.
Steps: - Cover the table with towels or something absorbent. I now use a large welping pad which I bought on-line at Petco - got this terrific tip from Dawn Savage who I met at Jean Gauger's butterfly jacket workshop in Portland in May, 2013.
- Put down your bubble wrap or non skid rug pads which is what I now use. A great tip from Jean Gauger.
- Place painters plastic on top of the rug liner.
- Place your resist on top of the painter's plastic.

I use white super fine merino wool roving for a lot of my projects.


My recent trip to the Caribbean was my inspiration for this vest which I'm calling Crane Beach - Barbados. It is seamless and reversible and is beautiful on both sides which are lined with vintage buttons.


A resist was used for the vest allowing for 30% shrinkage.

The vest is wetted out and ready for rolling. The resist is between the layers and will be removed once the garment starts to shrink and it has initially held together.

Another reversible seamless vest made with one layer of roving sandwiches between two layers of silk. One vintage button is used for the closure.


The garment was made using a resist.

Sunday, June 2, 2013
Creating a Seamless Nuno Felted Reversible Jacket
The intensive four day nuno felted butterfly jacket workshop in beautiful Portland, Oregon was fun, rewarding and a real learning experience. It was a joy to meet and hang out with Kristy Kun, the owner of Opulent Fibers; Jean Gauger, our inspirational instructor; and the ten other amazingly talented classmates some of whom were locals, most from out of State and one from Canada.
I flew up to Portland directly from Long Beach on Jet Blue which was easy peasy. I picked up a taxi from the airport which took me to the Evermore Guest House recommended by Kristy and although I never saw a worker there for the first three days, the victorian house built in 1909 was beautiful, clean and homey. My spacious room with a king size bed was luxurious(especially without my three dogs) and the old claw foot tub (there was also a shower)offered a much needed nightly soak after walking several miles to/from the workshop and standing on my feet all day.


The finished jacket used about 12 yards of silk fabric and about 6 oz. of wool roving. I eco printed and dyed most of the fabrics with eucalyptus prior to the workshop. Also used a vintage sari fabric and some silks including the black and white polka dot that I purchased on our field trip to the Mill End Store in Portland.

The sari fabric contained little beads which felted in beautifully.

The back of the jacket.

This is technically the inside of this reversible jacket.

The back of what is technically the inside of the jacket.

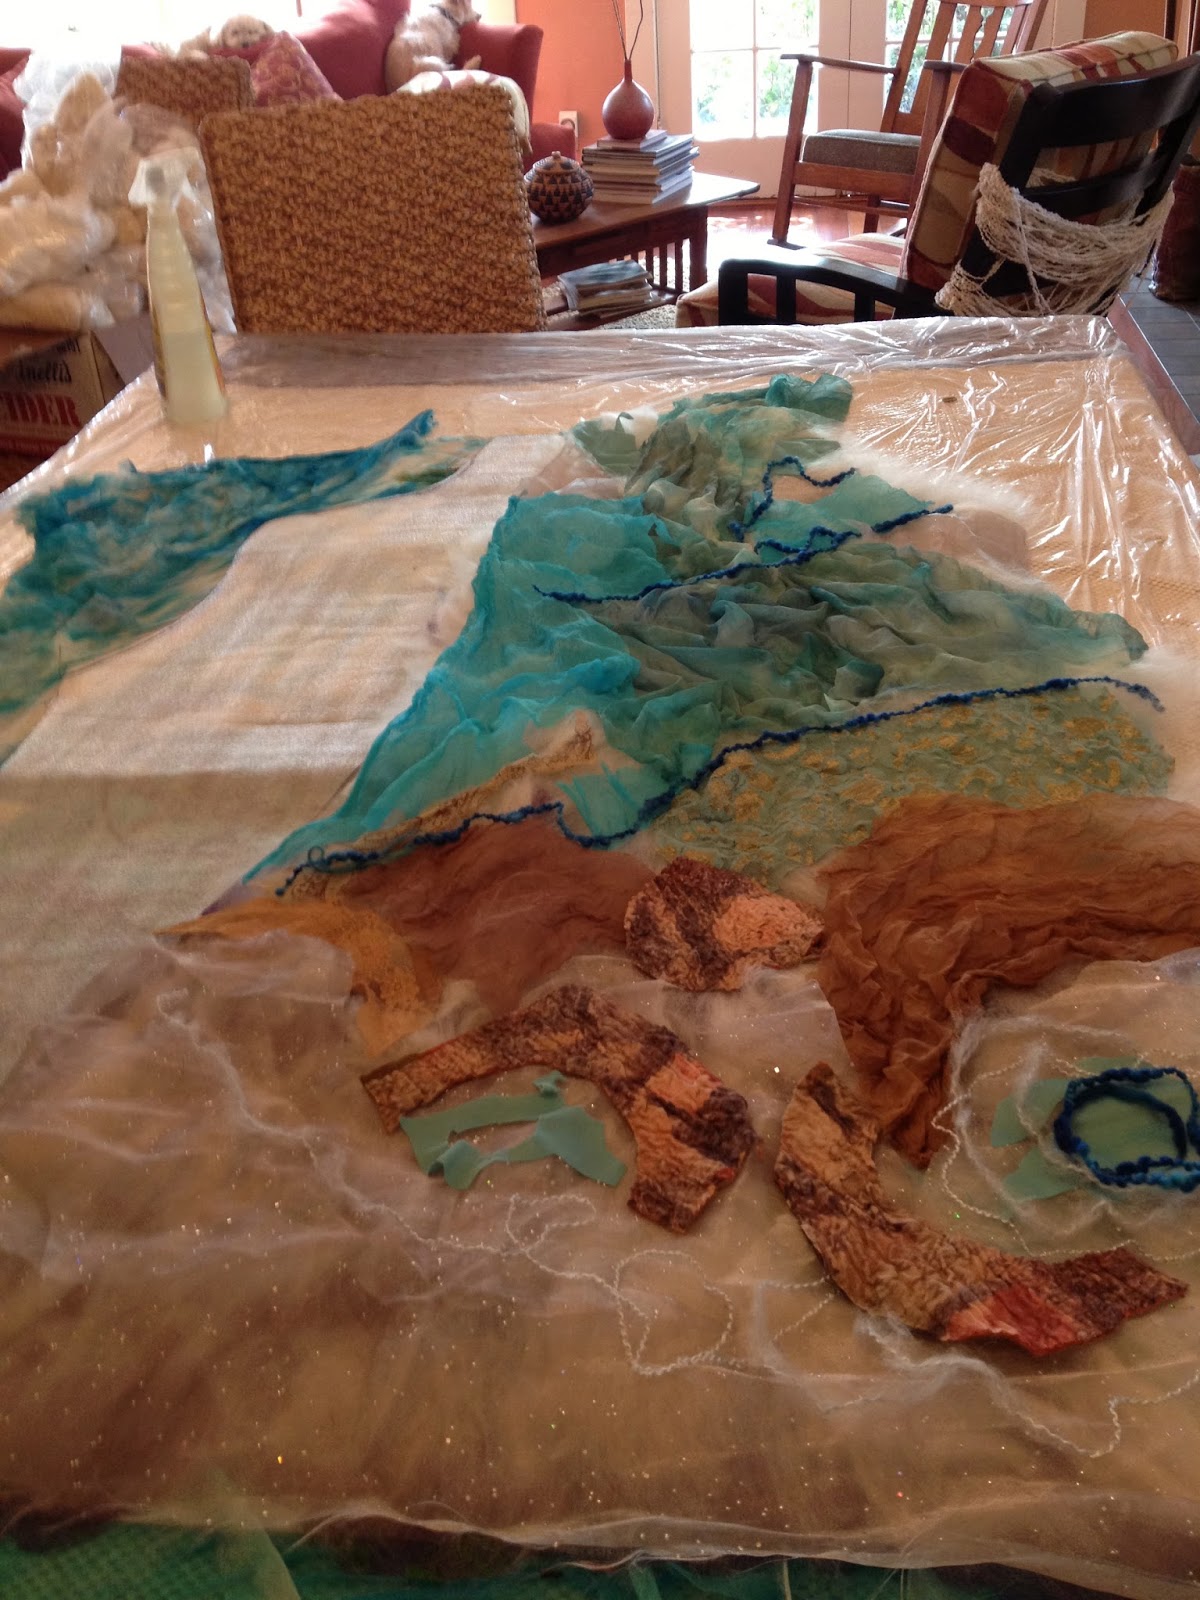
Working from the inside out, I first laid out silk hankies on my plastic resist.

Jean and I discussing the direction for laying out the wool roving.

The back layout is complete except for the last layer of silk which will be put on after the front is complete. Here I have flipped it and will now work the front of the resist.

I add silk fabric to the left front flap which will be the inside flap. Now I'm laying down the wool roving.

I finished laying out the roving on the left front which will be the inside flap.

Then placed another resist over the inside front flap.

Working the outside front flap with silk fabric.

The final layout is the outer most layer of the back.
And then lots and lots of rolling.


Throwing and slamming - a great way to release those frustrations!

Keep working it, it hasn't shrunk enough yet.

My home away from home for 5 nights. I enjoyed the walk to/from the workshop either via Division Street or Clinton Street. And what awesome eateries along the way not to mention fun funky shops and the fab New Seasons Grocery Store.


Subscribe to:
Posts (Atom)